
Integrate SignWell With QuickBooks Online
QuickBooks Online is an accounting system that lets you connect with SignWell to send, sign, and manage your Estimates and Invoices.
We offer an integration with QuickBooks Online. Here are a few of the key features of this integration:
- Create documents in SignWell from QuickBooks Online Estimates and Invoices, prepopulated with customer information and email messages.
- Send and electronically sign QuickBooks Online Estimates or Invoices in SignWell, and append signed documents to the corresponding records in QuickBooks Online.
- Track and automatically update the status of Estimates in SignWell, and simultaneously in QuickBooks Online.
- Options to automatically convert signed Estimates into Invoices and automatically send converted Invoices to customers through QuickBooks Online
Getting Started with QuickBooks Online
You can learn more or sign up by visiting their website: https://quickbooks.intuit.com/online/
How do I connect SignWell with QuickBooks Online?
You can connect SignWell with QuickBooks Online in either of 2 different ways: from within your QuickBooks Online account, or from within your SignWell account.
Connect Within SignWell
Log in to your SignWell account, navigate to Settings > Integrations, and select "Connect" in the QuickBooks Online integration option.
 You will need to log into your QuickBooks Online account (or sign up if you don't have an account yet) and authorize SignWell to access your data in QuickBooks Online.

The integration with SignWell and QuickBooks Online will then be active.
If your browser is compatible, you'll be directed to install the browser extension to use the integration without leaving QuickBooks Online:

Connect Within QuickBooks
Log in to your QuickBooks Online account, navigate to the App Store, search for "SignWell" and select "Get App Now":

You can also click here directly to Connect SignWell with QuickBooks Online | Intuit.
Then, log into your SignWell account like normal (or sign up if you don't have an account yet):

If you have multiple workspaces, click on the workspace that you want to integrate with:

From there, you will authorize SignWell to access your data in QuickBooks Online (if not already approved), and then the integration between SignWell and QuickBooks Online will be active.
If you haven't yet and if your browser is compatible, you can install the browser extension to use the integration without leaving QuickBooks Online.
How do I use the Integration with SignWell and QuickBooks Online?
You can send your QuickBooks Online records for e-signing in either of 2 ways: by clicking the browser extension from the Estimates or Invoices in your QuickBooks Online account, or by selecting your Estimates or Invoices from within SignWell.
Sending QuickBooks Online Records with the Browser Extension
If you didn't install the SignWell for QuickBooks browser extension yet, you can do so here (if your browser is compatible). See also:
- SignWell for QuickBooks Extension for Chrome
- SignWell for QuickBooks Extension for Firefox
- (Coming Soon!) SignWell for QuickBooks Extension for Safari
You may also install it directly from your Settings > Integrations in SignWell for QuickBooks Online:

Note: this button will only be shown if your browser is compatible with the extension.
The extension makes it easy for you to send Estimates or Invoices to be signed electronically with SignWell without leaving QuickBooks Online:

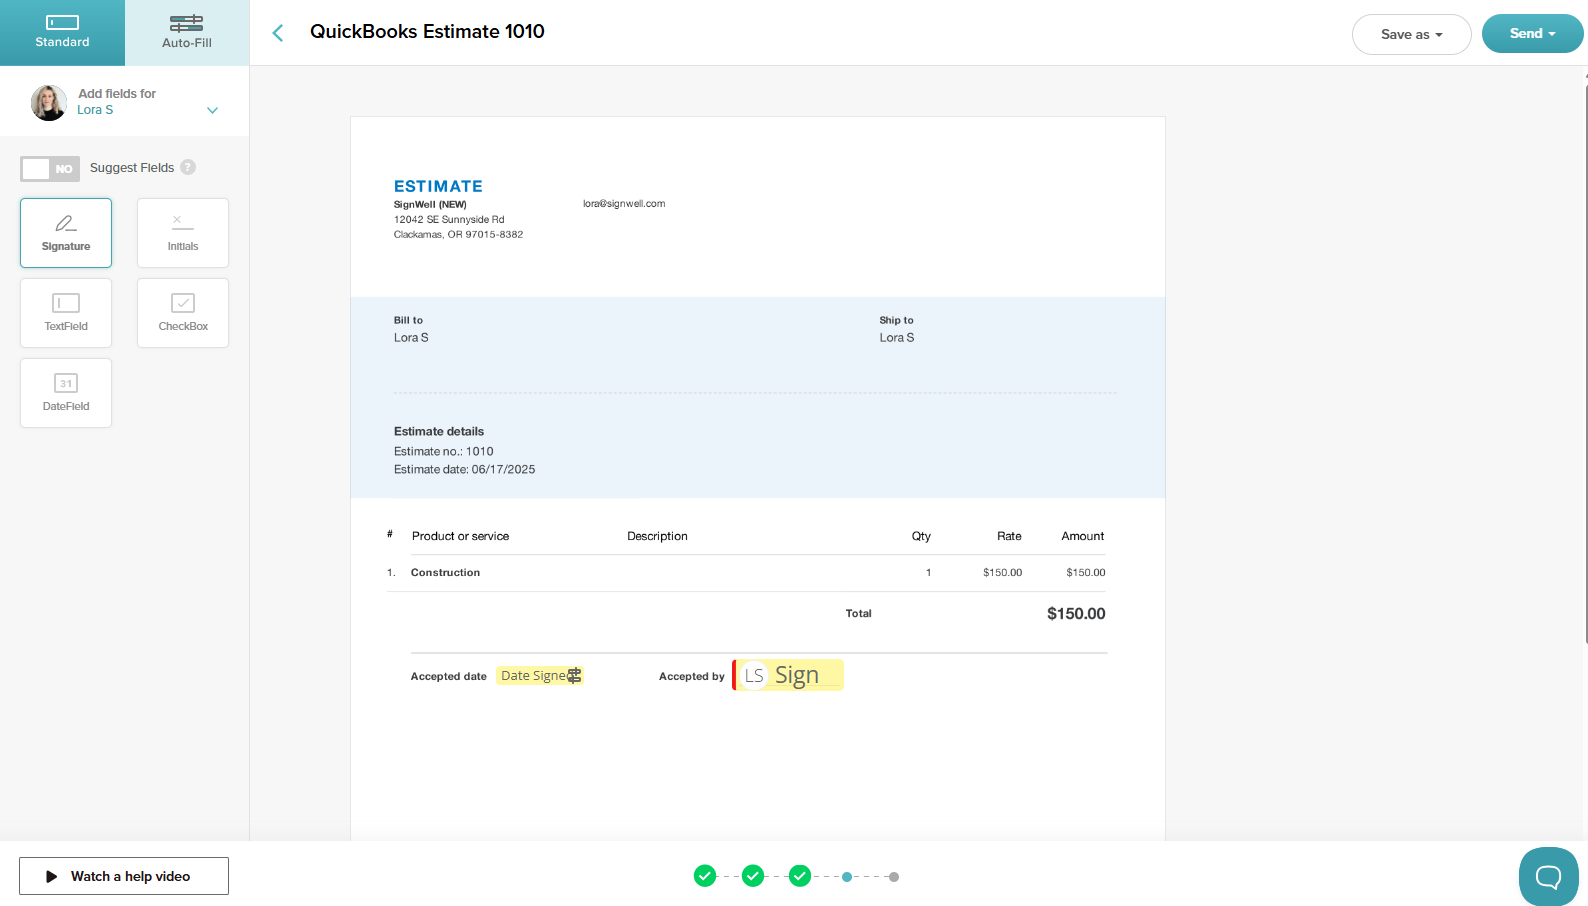
Send QuickBooks Online Statements For Signature
To send an Estimate or Invoice to be e-signed, click on the " New Document" button from your Documents dashboard:

Click " Select from QuickBooks Online":

SignWell will show a list of your QuickBooks Online statements with the most recent displayed by default:

If you don't see the Estimate or Invoice you're looking for, click Search and enter the Estimate number (switch to the Invoice tab to Search for an Invoice).
You will need to click on the " Search" button or press ENTER on your keyboard to initiate the search in QuickBooks Online:

You can select single or multiple statements from QuickBooks Online (as long as they belong to the same Customer - you may not create documents using statements from different customers):

When you're ready, click the " Continue" button.
If the selected QuickBooks Online statement(s) don't have a customer email, you'll be prompted to add their Contact details on the following screen:


Convert Estimates Into Invoices


Automatically Send Converted Invoices
If you'd like to automatically send Invoices that were converted from signed Estimates (mentioned above), enable the 3rd SignWell setting to Auto-send converted Invoices to customers:

Update QuickBooks Online With Document Activity


Deactivating Your QuickBooks Online Integration

Alternatively, you can disable the integration from your QuickBooks Online Account by navigating to Apps > My apps and click "Disconnect" from there.
This will successfully disable the integration connection between SignWell and QuickBooks Online in that Workspace.
Still need help? Please email our support: support@signwell.com.